Salad Spinner Art & Other Uses!

Did you ever see those TOKIG salad spinners at IKEA?  Well did you know you can spin more than salad?  They're great for art and they're actually the great for your delicates (you know your over the shoulder, boulder holders?!)!

So I won't be showing you my bra spinning but I will show you how we do art with them.

Paint
We start with some paints.  I'm using acrylic paints mixed with a bit of water.  Those plastic paint bottles are actually from hair dying kits that I've washed out really well and they make great bottles for paints and glue for crafts.

Salad Spinner

Paper/Cardstock


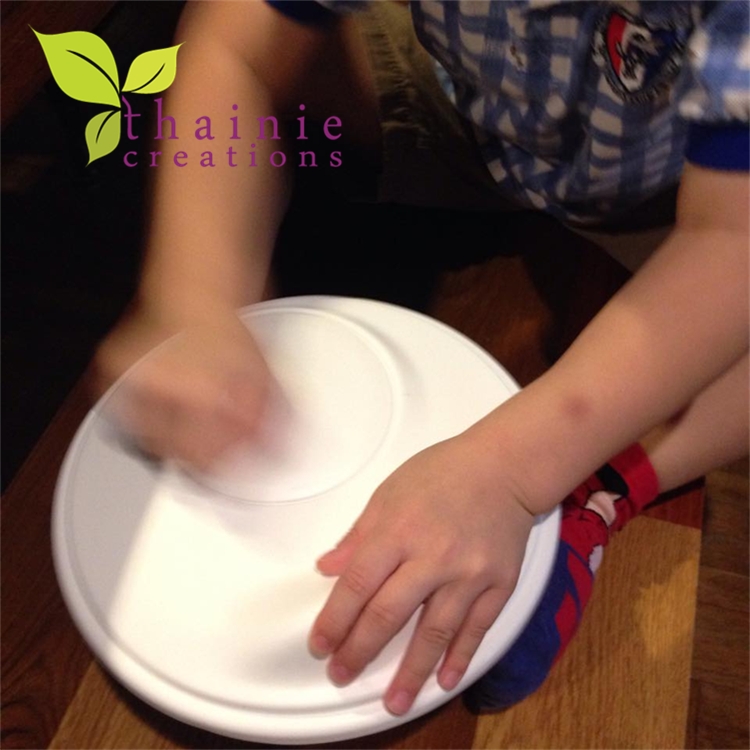
Then you load your paper inside and squeeze a bit of paint where ever you want.
Then close and spin to your heart's content...
And you'll get some beautiful one of kind art pieces like these!
You might want to get one just for art projects and another for your delicates since it can get a bit messy!!!

Happy Crafting!!xx

24 Goods Things To Do Till Christmas

Our Elf on the Shelf arrives on the first day of December and along with his arrival he brings Santa's sack filled with Advent Calendar pouches and Christmas books.
 
In past years we usually filled the pouches with candy but the kids have been having way too much sweets lately so I thought we would do something new and a little bit more meaningful.  I got this idea from a fellow mommy friend and tweaked her (already amazing) list to suit our family a bit.  It's a list of 24 good things, so each day the kids will open a pouch and we'll do what is on the sheet of paper.   
 So here is our list for this year.... 
1.         Make popcorn and watch a holiday movie

2.       Bake cookies and bring them to friends at school

3.       Gather clothes to donate

4.       Sing Christmas songs and dance around a lot

5.       Make cards for your friends at school

6.       Donate books to your school

7.       Write a letter to Santa

8.       Make cards for all the grandparents and mail them

9.       Gather toys to donate

10.      Color a Christmas picture and hang paper snowflakes

11.        Make special cards and send to your cousins

12.       Have a campout by the Christmas tree

13.       Dress up and take silly Christmas pictures.   

14.      Make Olaf marshmallows and dip in hot chocolate!

15.       Bring coffee gift cards to your teacher and say thank you

16.      Give the guards some cookies and say thank you

17.       Do a Christmas song & dance show for your parents

18.       Make cards for all your teachers

19.      Give flowers to your teachers and say thank you

20.     Go look at Christmas lights

21.       Make bread dough ornaments

22.     Call grandparents and sing a Christmas song

23.     Draw a thank you note for Santa

24.     Leave a treat for Santa and his reindeer

So here's goes hopefully something special and hope this December brings you and your family a lot of somethings special too!!

Thainie Craft: Spooky Haunted House Fill and Color Cut-It-Out

Another cute Halloween craft for the kiddies.  I got this creative idea from Sarah Jane's blog.  I tried to find a print and cut or any cuts from the Silhouette shop but couldn't find any so I used Sarah's cute template as a template for cutting on the Cameo.  Here's the outline and all you need to do is:
- Click this image and then it will give you the full size image
- Right click and save to your computer
- Open your Silhouette Studio
- Drag or open the image in your new file and according to your paper choice (i.e. A4, letter...)
- "Image trace" the entire house
- Select "Trace"
- Either resize now or you could resize when you first drag to the mat

OR if you don't have a cutting machine, it's easy to cut out with a cutter or exacto knife.

And you'll have a super spooky haunted house for your kids or you to decorate for Halloween.

Halloween: Monster High's Deuce Gorgon

This year my son wanted to be Deuce Gorgon from Monster High and so I looked at the Deuce doll that we had and noted what I needed to get together to make a costume for him.  It's quite an easy ensemble, this was my checklist for Deuce (some items we already had too).
- Red Tank (or a red tee and cut off the sleeves)
This was hard to find on the internet and so luckily we had the doll and so I took a hi res picture of the tee and then recolored the red area.  You can print on iron-on/T-shrit transfer paper and iron on the tank.
  - Striped Tee 
I was really lucky to have found a close enough pattern but it had this hideous embroidered cartoon **that you cannot remove even with patience and a thread cutter** and so I just cut it out and patched it up with the sleeves that were cut off.  Then you can just cut the middle of the tee and create the sleeveless jacket.  I also found the perfect image that I printed on T-shirt transfer paper so that I could iron on the patch.  Here's the image.

- Black Jeans
We had black jeans already and so I took a washable white fabric pencil then thought to use a Crayola white crayon and drew the little diamonds all over.  The crayon is washable (hopefully) so I hope it will wash off!

- Black Glove
We found a cheap pair at a party store, they were perfect.
- Belt
We had a metal buckle belt already and so I just printed the cassette image that I created and then laminated and used foam tape to attach to the buckle. 
- Black cuff piece (piece of felt)
I just cut a piece of felt and then ironed on another skull on it.

- Checkered Shoes 
Didn't have these so he'll just wear his black sneakers he has.  
- Snake Headpiece
This was the most daunting part of the costume to do but I was excited to create it. 

First I needed a head model, so I took a cap of his and stuffed it with clothes, then placed it on a stand  and saran wrapped all over it.


 Then I got modeling clay, the type where it will air dry light.  So I first worked on the

 After the snakes were done and left to dry (I forgot to mention that when you're doing the snakes, use another wire to make scores onto one side of the snake to create a scales look, do the same with headpiece too--I had used this iron grill thingy), I took a big ball of modeling clay and flattened it into a round piece and then put it over the head model and molded around the head then a placed each snake into place and added a bit more clay to help support some snakes but be sure to let your snakes dry before doing this since modeling clay is quite sticky.

Then let it dry completely for about 2-3 days, I took it off the head model on day 2 so that the inside could dry.  I sponge painted the headpiece with yellow and light green acrylic paints.  Then I use Mod Podge Matte all over and topped with Mod Podge Gloss.  The tongues are also made of red modeling clay, just do strips and let dry then cut off that triangular trip and glue into mouth.  The eyes are gold beads that I glued into the sockets.

 - Scales
I printed a bunch of these on tattoo paper.


 - Chain necklace and belt addition + Sunglasses
I found some plastic chains and red sunglasses at the 60 baht shop Daiso and they were perfect for this.

So I hope you will be able to create your own Deuce and hope that I didn't miss anything!!  Happy Crafting!

Stickers for the Stinkies

 I saw this just recently on my FB feed and knew I had to do this since we just swapped out my little stinkies' (my two younger kids) chest of drawers with my older stinkie's (my eldest daughter) ones.  The kids' loved it and were excited to get things organized (starting them young!) and even asked for a few more clothes silhouettes that weren't represented!

I also experimented with painting vinyl stickers with Mod Podge.  I tried one with just Mod Podge Extreme Glitter painted on but I thought it was a bit still tacky and it turned out that when you use transfer tape/masking tape to transfer your sticker and peel it off, the glue came off too.  And so I painted another vinyl sticker sheet with Mod Podge Extreme Glitter and a top coat of Mod Podge Matte and it turned out nicely. 


I have also posted these silhouettes if you would like to make them for your stinkies.  Just click to bring up the image and you can right click and save to your computer to use with the Silhouette software.  Once you're on Silhouette software, just use the Image Trace button and highlight the image and there should be no need to do anything since it's a simple image.

I also tried coating paper stickers and photographs with the Mod Podge and they turned out really nice and thinking to use it in an upcoming Christmas craft.  Stay tuned!

Happy Crafting!

Thainie Crafty Field Trip

I have been wanting to check these shops out for the longest time and finally got a chance a few weeks ago when I had to find some items for a project I'm working on.  Also any kind of craft/stationary shop, I'm in for an outing!  All these shops are located on the 5th Floor of Central Rama 9.

(website in Thai only)
I love this shop, it reminds me of the stationary shops when I was growing up in San Francisco.  They have a good selection of paints, pens, stamps, paper, the list goes on.  
Doesn't the shop front already look inviting??  
  Sharpies!!!!  And not Sharkies or Starpies!!
 *** Update, you can now find an assorted array of Sharpies at most B2S stores!

 Assorted craft paints, glues, glitter, etc...
More paint, vinyl stickers, papers, canvases, etc...

Cheap assortment of stamps. 


(website in Thai and English) 
 A very nice store for your scrapbooking needs, has a good selection of Martha Stewart items, Cricut and other brands.  But the most important....they have Mod Podge!!!!

 Now if you're not acquainted with Mod Podge, try doing a search and if you are interested in experimenting with it, I suggest you get the originals to play with, which is the Mod Podge Matte or Gloss.
(website in Thai and Japanese) 
I'm always torn between Daiso and Komonoya but they both have their own items distinctive in their stores.  But at this Komonoya, I found some really nice felt items.

Happy Crafting!

Masking Tape

Did you know you can use masking tape for sticker transferring?  Here are some pictures showing how easy it is and a cheaper solution.
I also found wider masking tape at B2S, and it's come in real handy. And while we're talking masking tape, check out these from Scotch.  They have them at most B2S.  A cheaper option to washi tape too.
 ***Unfortunately, I'm not sponsored by Scotch and this post are just my random finds.

Thainie Decor: Playing with Mirrors

Looking for a quick weekend project that will brighten up your place?

We have a lot of walls in our condo and they're mostly concrete so putting nails in them is not the easiest thing to do.  There are already a lot of frames hanging on the other walls and so I knew I wanted mirrors.  


I had been eyeing these IKEA HÖNEFOSS mirrors and decided to get 2 packs.  At first, I thought of just doing small clusters but then thought to do a cascading design with them so that it would cover most of the wall.

So this is how it turned out. 
I didn't measure anything but they came out all pretty straight except maybe the last one to the left but I like it anyways!

Thainie Places: Elvira (and not the Princess of Darkness)

A lot of people always ask when and how did I get into sewing, well I started sewing about 5 years ago, just after my daughter was born.  I wanted to make Halloween costumes for her as well as other crafty projects.  I looked around and checked out Elvira's sewing center at Taisin Square (right off the Phra Khanong BTS Station).

A couple of years ago the cheapest machine was 4,000 baht but now they start at 8,000 baht, other brands in the malls are cheaper but the thing about buying Elvira is that it comes with a membership that gives you discounts off sewing supplies, a subscription to their sewing magazines (with patterns and projects) and the best thing is you can get free lessons there as much as you like, they are very happy to help, even in English --- since it's more seeing than saying anyways.  I still remember breastfeeding and then popping out to an hour sewing lesson.  Other brands are usually the same with giving lessons but at times (also when there's only one staff attending) in the malls the space is not adequate for lessons so it's nice that you can pop into here anytime.

So I suggest if you want to give sewing a try, research the machine you want and also look at your budget.  You really don't need an expensive all automated machine (even though they're really cool and easy to use), you can even bring in a project that you want to work on and test the machine out with it.  

There's also so many videos and how to's online nowadays when I didn't have the time or when I needed a refresher course on sewing different projects.  Let me know if you have any more questions, happy to help!  Happy crafting!  

Thainie Finds: Transparent Thread


Did you know about a little wonder called "invisible thread"?  It is really useful for when you do machine quilting and also using it with embroidery.  It can even create a hand stitched seam that looks really nice without actually hand stitching yourself---when machine stitching, you're top and bottom thread is a color thread and so if you pop this invisible thread in your bobbin, you can create a hand stitched seam!  Here's more info on invisible thread.  I will have to post a pic of invisible thread in action but for now I have only used it to hem some pants and also sew some shopping bags.  Another use is when you're working with a really colorful print and you don't want to use color thread to distract from the print.  Try checking it out!

Sold at most department stores in the sewing section, I got mine at Siam Paragon on the 5th floor where all the sewing/knitting supplies are.  Price 90 baht.

Thainie Reads: More Mo Please

I have always been a book lover and I knew that when I had kids I wanted them to love reading as much as I did.  Well, having kids now and especially in this age of high tech gadgets like their toys and the iPad, I'm relieved that they still prefer a night of reading books than clicking on their iPad.  

Lately, my 5 year old daughter has been crazy about reading Mo Willems' Elephant and Piggie book series.  They are absolutely delightful and perfect for emergent readers.  He is also the author of the Pigeon books that my kids think are hilarious, especially when my hubby narrates them in funny accents!

Try checking them out by visiting Mo's website here.

Books can be found at all Asia Books and Kinokuniya bookstores, prices range from 200 baht upwards.

Thainie Gift: Bon Voyage Book


One of my daughter's friend from school is leaving after this school year, her family is moving to another country (sadly this is a regular occurrence when your child is in an international school).  I wanted to find a gift that a couple of her other classmates can join in with too.  

In Thailand, we have a "friendship book", it's a book of blank pages that we pass around to our friends and they decorate some pages to commemorate our friendship, we do this usually when we're about to graduate from high school.  So I thought about putting together a book that her friends can all draw and write their messages in.  But of course that was too simple for me!  I thought why not throw in a book about Thailand so that her and her whole family can enjoy too.  

I picked up this book, When I Grow Up (in Thailand), sold at Asia Books and Kinokuniya.  And my daughter had decorated her page for her friend and I also printed some photos to add into the book as well.  We added stickers and remember that die-cut washi tape, that went perfect in this book!  So we'll pass this to her other friends and they'll get a chance to decorate it too.

Also made it more customized by printing her head and then sticking it onto the kid's head on the book cover.  And there, a wonderful going away gift idea that can be used with other books as well.  *** Of course, we have to mention to the kiddies that this is a very special case and that you shouldn't really write in your other books!!!  Wheww!

Happy crafting! 

When I Grow Up (In Thailand) by Janice Santikarn, 300 baht, ISBN 974-91727-9-5.  Sold at all Asia Books and Kinokuniya bookstores.


Thainie Finds: Washi Me Happy

I'm kinda loving the newly revamped 4th floor at The Emporium, I mean like I didn't love it before since it was the stationary and toy departments!  Well look what I stumbled upon... washi tape that were also die-cut!  This is going to be perfect for an upcoming project.  Stay tuned.

Masking Tape 190 baht-Round Top IC4DESIGN, The Emporium 4th Floor

Thainie Finds: Frozen Costumes

It seems that anything Frozen is hot now and also selling out!  Well if you would like to get your hands on an Elsa or Anna costume, you're in luck, Ri Tah Rae has them and they're gorgeous.  The Elsa costumes (2,900 baht) are ready but they are still working on Anna (estimated 3,400 baht) since it's a total of 4 pieces.  Sizes start at XS which is about 2-3 year old size. 

Ri Tah Rae can be found here...


Thainie DIY: Bedside Table to Child's Dressing Table

I love all my IKEA hacks but I think this one has to be one of my all time favorite.  Was looking for an affordable little dressing table for my daughter and did not want something too girly or painted with bunches of cartoons.  Then I found these at IKEA and had an idea!
Forgot that there was also the IKEA children's chair that we had already too.
And put together, it was the perfect height for a little girl's dressing table with plenty of room for all her jewelry, hair accessories and even toys!

I used my Silhouette to cut out a stencil to paint a top border to dress it up a little and I loved how it turned out!

Thainie DIY: Washi Your Nyttja

I had searched the web on how to paint IKEA Nyttja frames, I tried sanding before spray painting and painting with acrylics but it just did not turn out right.  The spray paint sorta worked but once sanded it had a rough feel/look once it was sprayed over.  When I tried painting it with acrylic, after it dried it peeled really easily.  So I thought, how about washi tape?  It turned out actually pretty nice!  
 About spray painting or painting, maybe a primer would have worked but I couldn't be bothered now, I love the washi look!

Thainie DIY: IKEA Draggan to Dragon and Dinosaur Keeper

More to share on IKEA hacks, this is not really a hack but more of a re-use.  Check out this cute bathroom trolley IKEA Draggan (how can this not be used to store dragons?) turned Dragon and Dinosaur keeper.  Now my son can both store and use his little cart to pick up his dragons and dinosaurs around the room with fun and ease!

Thainie DIY: IKEA Besta turned Toy Playhouse

I've been working on a project and it involves IKEA hacks, will be showing the reveal soon but for now I wanted to share this hack that uses the Besta shelf to create a custom toy playhouse for your kids.  It can be easily customized for your girl or boy, who says playhouses/dollhouses are for girls only!!!
 So here's how you do it:
  • You'll need
    • Shelf
    • Double sided tape
    • Scrapbook paper
    • Paper cutter
    • Pencil 

  • Get yourself a Besta shelf or any shelf that you want to repurpose
  • If there is a back panel, mark the lines that you'll cover with wallpaper/scrapbook paper
  • Cut your wallpaper and use the double sided tape to stick to the panel, if your shelf doesn't have a back panel then you can stick to the back of the shelf (hope that makes sense!?)
  • Add toys and kids and enjoy!
*** I thought to make one for my son but with jungle themed wallpaper for his dinosaurs but lets see how this one goes.

Thainie Tees: Costumes from T-shirts

Remember my post about t-shirt costumes, well here are some past projects I had promised to share.

From top left to bottom right.
  • Nutcraker Soldiers Costume
  • Nutcraker Mice Costume
  • Crocodile Tee
  • Pirate Costume
  • Cheerleader Dresses
  • Father's Day tee

Thainie Art: Paint Watercolor with Acrylics

Did you know you can paint watercolors with acrylics?  I needed to make a costume for my daughter's international day and she was representing France, so I searched the web and found a cute idea of drawing and coloring on a white tee.  I decided to draw the Eiffel Tower and trees (easy enough right?) but when it came to painting with acrylics I thought it would be too heavy but since it was acrylics, I tried watering it down to create watercolor effect.  So if you would like to try this, I recommend:
  • Start with a little dab of acrylic and work the water into it and you can create an ombre effect by watering it down more.
  • Do little by little, let some parts dry and layer darker or lighter colors in.
  • When done, iron the tee to set the paint so that it won't bleed in the wash.
Loved how it turned out and can't wait to try it again, maybe dinosaurs???

Pans Stand (IKEA Hack)

A simple solution for storing your pans.  I used the IKEA INREDA DVD Rack and just placed it into my kitchen cabinet.  It worked out perfectly and stored the pans quite neatly.
 

Thainie Tips: Ecstatic about Elastic

I love working with t-shirt fabric for my kids costumes, it's easily available and comfy when worn.  Here's a quick tip for adding elastic to the collar, sleeves and the bottom.  

You will see that there's already a hem, all you have to do is make a little slit in the inside (make sure it's only in the inside and that you're not cutting the right/front side) and add your elastic and sew it up.

This was really helpful when making a dozen reindeers this past Christmas!

Kids Token System

After much yelling and screaming about picking up this, clean up that and don't do this and that, my hubby and I were looking at ways to motivate our children or bluntly---bribe them to be good!

I searched the web and found wonderful ideas about stickers and charts but we wanted a system that was more visually attainable.  So we decided to work with tokens or poker chips.  Each child gets their own token color (so they can't pinch some from their sibling's) and collects them in their own box. My hubby has a daily token reward ceremony for the kids and they get so excited and happy to receive their tokens and surprisingly not bummed when they don't but are determined to get their tokens the next day! This also works when disciplining them, so if they misbehave or don't behave nicely then they can have their token(s) taken away. 

They get tokens based on different chores they do or accomplishments.  We are starting off with just a few so it was simple for them to understand.  They would get rewarded with tokens for not peeing in the bed (we don't punish them since it's not really their fault and did you know that bed wetting is actually hereditary?), sleeping in their bed (they like getting in our bed, which is fine but then they pee in our bed--sometimes after peeing in theirs!) and cleaning up their room.
The rewards are different toys, books, privileges (i.e. going to a favorite play place) and they can see what rewards they can receive since we place them up (very high) so they are motivated.  This is another wonderful way to help children earn their toys and teach them not to take these items for granted and value each toy/item they receive.

They also have another color token that they can receive from their school teacher to receive a super duper prize as well!  This has been tremendously effective with my son and with great help from his teacher.

So far, it's been working wonderfully and we hope to add more chores onto the chart and later introduce monetary rewards.

Have a wonderful weekend!!!

Sew What?: Pillow Talk

 Lately, I've been crazy about pillows/throw pillows for the couch.  I had just finish doing a big red heart pillow case (you can see a small glimpse in the pic above--will try to post a better pic) after seeing a pin on Pinterest and then I saw another one with the word "hello" and it was so cutie chic that I had to add it to our couch collection!  Also they're cheaper, super easy and fast to make.

You'll need:
  • Freezer paper 
  • Pillow fabric or buy a ready made pillow case from IKEA (I'm using a thick cotton fabric from IKEA and stitching my own pillow case here--for a great tutorial on how to make your own pillow cases, check out MADE's for simple cases and for zippered cases check out Design Sponge's) 
  • Pillow cushion, I got mine at INDEX Mall, 16"x16" for 99 baht---these pillows make great presents (another upcoming post)
  • Craft paint for fabric, I'm using Martha Stewarts CRAFT Paint/Multi-Surface Metallic Acrylic Craft Paint in GOLD
  • Sponge and bowl for paint
  • Iron
  • Hidden Zipper (if you're making a pillow case from scratch)
  • Freezer paper (I'm using Reynold's)
  • Cutting machine (I'm using my invaluable Cameo)
 When you have all your materials, it's time to design the stencil.  Since I was making a 16"x16" pillow and my Cameo can only cut up to 12"x12", I had to factor the pillow size by making a square box that was 16"x16" to get an idea how big the stencil will be.  
Once you have an idea how big you want your stencil to be on the pillow case then you choose the circle shape and then your font.  I'm using "Xiomara" (you can download free at dafont.com) font and then once I fixed the look of the word I used "weld".  When you're happy with your design, cut on Reynold's freezer paper or your stencil media of choice.
 
Now you're ready to iron and paint.
It has taken me lots of practice and fails (a lot) when it comes to stenciling and painting.  
 I have these tips:
  • Iron with medium heat, not low or high but medium, just enough to stick the freezer paper onto the fabric but not hot enough to wrinkle and cause little creases that paint can escape and bleed out.
  • Careful with edges, anytime you're ironing over/around edges, don't drag the iron, lift, wiggle and press.  Don't drag!
  • Sponge paint on instead of brushing.  First put your paint into a bowl and dip your sponge in flat, then squeeze excess on the side of the bowl.  Then press and blot paint on stencil being extra careful around edges.
  • Patience....I am soooo guilty of trying to remove the stencil even when the paint is still not dry.  Don't do this, be patient and let paint dry completely before removing stencil.  You will get crisper lines and hopefully no smudges.

Once you're done with painting and removing the stencil, take a scrap piece of fabric and place over the design and iron over to set the paint.

Finish sewing pillow.....REMEMBER!!!!!  Put the zipper on the bottom of your design so that it will not be visible when you have it adorned on your couch!!!!

Happy crafting!!!