Showing posts with label IKEA. Show all posts

Thainie DIY: Soft Toys Basket/Display

I love, love, love these baskets!  

As you may know or will know now, I love to rearrange our home, it's amazing how a room can totally transform with just a move of a piece of furniture or some additions (or subtractions).  

I have been trying to find a nice and inexpensive way to display the kids' soft toys which were piled away in a toy box, since the ones that we keep usually have a sentimental value to either us or them.  Well I thought about these IKEA green baskets but always decided no since you can't really see the soft toys and it's just another place to pile them.  But I thought, why not cut them out? 

And so I took my IKEA membership card and cashed me out some coupons!!!  Little secret, it's nice to have friends that use your card and earn points for you!  These baskets were 199 baht each and they are very sturdy, we actually use one for our laundry (that's how after looking at it everyday I finally thought of a hack!).  


So all you have to do is just cut an opening out and there you go!  Easy hack but really cute display basket!   

WARNING::: Please be very, very, very, extra specially, very careful when using a cutter to cut this basket (or anything with a cutter, they actually terrify me greatly and I avoid using one at all cost but my scissors were just not cutting it **pun intended) and I almost gashed myself several times!  Also, always cut away from yourself!

And here's a close up, you can see it's not perfect (after cutting I also shaved away the sharp edges) but the soft toys will make up for that.

Salad Spinner Art & Other Uses!

Did you ever see those TOKIG salad spinners at IKEA?  Well did you know you can spin more than salad?  They're great for art and they're actually the great for your delicates (you know your over the shoulder, boulder holders?!)!

So I won't be showing you my bra spinning but I will show you how we do art with them.

Paint
We start with some paints.  I'm using acrylic paints mixed with a bit of water.  Those plastic paint bottles are actually from hair dying kits that I've washed out really well and they make great bottles for paints and glue for crafts.

Salad Spinner

Paper/Cardstock


Then you load your paper inside and squeeze a bit of paint where ever you want.
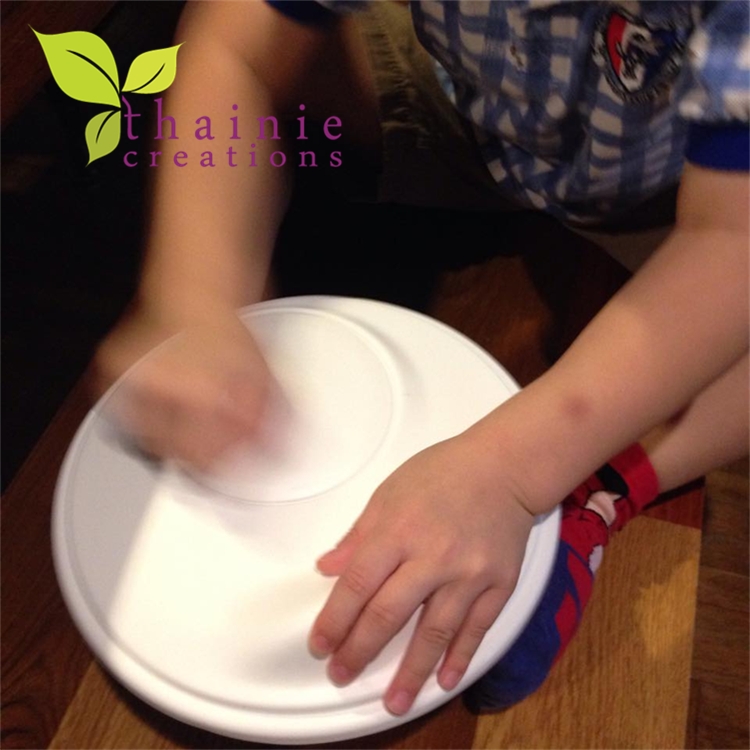
Then close and spin to your heart's content...
And you'll get some beautiful one of kind art pieces like these!
You might want to get one just for art projects and another for your delicates since it can get a bit messy!!!

Happy Crafting!!xx

Thainie Decor: Playing with Mirrors

Looking for a quick weekend project that will brighten up your place?

We have a lot of walls in our condo and they're mostly concrete so putting nails in them is not the easiest thing to do.  There are already a lot of frames hanging on the other walls and so I knew I wanted mirrors.  


I had been eyeing these IKEA HÖNEFOSS mirrors and decided to get 2 packs.  At first, I thought of just doing small clusters but then thought to do a cascading design with them so that it would cover most of the wall.

So this is how it turned out. 
I didn't measure anything but they came out all pretty straight except maybe the last one to the left but I like it anyways!

Thainie DIY: Bedside Table to Child's Dressing Table

I love all my IKEA hacks but I think this one has to be one of my all time favorite.  Was looking for an affordable little dressing table for my daughter and did not want something too girly or painted with bunches of cartoons.  Then I found these at IKEA and had an idea!
Forgot that there was also the IKEA children's chair that we had already too.
And put together, it was the perfect height for a little girl's dressing table with plenty of room for all her jewelry, hair accessories and even toys!

I used my Silhouette to cut out a stencil to paint a top border to dress it up a little and I loved how it turned out!

Thainie DIY: Washi Your Nyttja

I had searched the web on how to paint IKEA Nyttja frames, I tried sanding before spray painting and painting with acrylics but it just did not turn out right.  The spray paint sorta worked but once sanded it had a rough feel/look once it was sprayed over.  When I tried painting it with acrylic, after it dried it peeled really easily.  So I thought, how about washi tape?  It turned out actually pretty nice!  
 About spray painting or painting, maybe a primer would have worked but I couldn't be bothered now, I love the washi look!

Thainie DIY: IKEA Draggan to Dragon and Dinosaur Keeper

More to share on IKEA hacks, this is not really a hack but more of a re-use.  Check out this cute bathroom trolley IKEA Draggan (how can this not be used to store dragons?) turned Dragon and Dinosaur keeper.  Now my son can both store and use his little cart to pick up his dragons and dinosaurs around the room with fun and ease!

Thainie DIY: IKEA Besta turned Toy Playhouse

I've been working on a project and it involves IKEA hacks, will be showing the reveal soon but for now I wanted to share this hack that uses the Besta shelf to create a custom toy playhouse for your kids.  It can be easily customized for your girl or boy, who says playhouses/dollhouses are for girls only!!!
 So here's how you do it:
  • You'll need
    • Shelf
    • Double sided tape
    • Scrapbook paper
    • Paper cutter
    • Pencil 

  • Get yourself a Besta shelf or any shelf that you want to repurpose
  • If there is a back panel, mark the lines that you'll cover with wallpaper/scrapbook paper
  • Cut your wallpaper and use the double sided tape to stick to the panel, if your shelf doesn't have a back panel then you can stick to the back of the shelf (hope that makes sense!?)
  • Add toys and kids and enjoy!
*** I thought to make one for my son but with jungle themed wallpaper for his dinosaurs but lets see how this one goes.

Pans Stand (IKEA Hack)

A simple solution for storing your pans.  I used the IKEA INREDA DVD Rack and just placed it into my kitchen cabinet.  It worked out perfectly and stored the pans quite neatly.
 

Thainie Tip: Kids Room Storage

Since having kids, I've gone through so many storage bins, containers, etc... for their toys and they would either break or be used as makeshift go-carts, some kind of step ladder or just not used at all.  

I finally found a fantastic solution and you probably guessed it, it's from IKEA.  I got the biggest SAMLA plastic bin and they fit perfectly under the children's IKEA Sniglar beds (which sadly have been recalled but the other beds are just the same height) for easy clean up and storage.

DIY Baby Shower Keepsake

This diy idea actually came from a baby shower keepsake needed for my friend.  Originally it was suppose to be just onesie cut outs and hung on a string but then I stumbled upon a photo on Pinterest that used a frame although there were no instructions (since it's really easy!).

So thought I would share if you're interested in a keepsake for a baby shower or actually any party keepsake too!  Each guest can write their well wishes or in this case we asked each guest to either write some words of wisdom, pointers for the parents-to-be, etc...  After these onesie cards were each clipped on the ribbon to make a cute keepsake to take home.


You will need:
  • Stapler gun
  • Assorted ribbons
  • Frame
  • Mini wooden clips
  • Tape/masking tape
  • Note cards
  • Pens
 
 First, take all the insides out of your frame, this frame was perfect since it came in plastic and not glass.  Then take your ribbons, measure, cut and place where and how you want. 


 Then once you're good with the look of the ribbon, staple.  Remember to pull/tug so that it won't hang loose once the notes are clipped on the ribbons.

And that's it!  Now you just need your choice of note cards (I designed and cut my own with the Cameo) and you're ready to have guests fill them out.  A wonderful keepsake for such a wonderful occasion.

Thainie Craft: Another IKEA Christmas Ornament for the Kids

IKEA is great for getting some inspiration and sometimes I pick something out not even thinking about it and it turns out to be a great Christmas craft like this one.  

Got these heart cardboard ornaments and paired them with cut up cd pieces for a quick, easy and beautiful ornament for the tree!  


Dino Birthday Party Time!

Did I mention December is crazy?  Crazy busy with birthdays and holidays!  

This was also the first year that I was organizing a birthday party for my son.  Since the big (costly) hoopla that was my daughter's first birthday my husband and I both decided that it was much more practical and memorable if the children actually were at an age that they could understand birthdays as well as be excited about who they were going to invite.  So my son was turning 4 and he was ready for his party!   

The theme of course was dinosaurs and we had it at Playtime, which I love since it's not too big but we didn't get a room since the kids spend more time playing then in the room and we just had an area near the cafe for snacks and the birthday cupcakes.

I don't have much pics of the party since I was pretty much occupied entertaining but I did want to share some items that you might want to use.

This was the invitation:
You might not be able to see but at the corner there was a big chomp that I cut out with the Silhouette Cameo.

And then there was the goodie bag:
 Using the same dino artwork, I made stickers for the ziploc bag.  The goodie bag had a bunch of finds from Sampeng.  
  - Light baton/saber (12 for 120 baht)
  - Little Angry Bird bags (5 for 100 baht)
  - IKEA Tolsby frames (49 baht) --- this is my go to goodie bag item that I love and it's always an artwork cut out that you can insert your photo into.  This time it was a dino jungle and I've posted the artwork below for personal use too.  Just use the "Select Trace Area" in the Silhouette program and it will cut the inside. 
 
   - Sweet treats bought bulk from Makro Bangna


 And then there were the birthday cupcakes that were frosted and decorated with chocolate rocks and a little dino to take home too (bought from Pinata in soi 39, 12 for 100 baht).

Hope you thought this was dino-myte!

Thainie Craft: DIY Christmas Frame for Kids

With Thanksgiving and Christmas around the corner, I'm getting a head start on everything.  Beginning with preparations for our Thanksgiving dinner, we'll be having friends over with their kids and so I wanted to organize a fun but easy craft project for them to work on before or after dinner.  

I had a bunch of sequins and embellishments (from hoarding of course) and thought the children can glue them on to the IKEA NYTTJA (comes in pack of 2 and all colors) frames.  You can also make these goody bag treats too and just organize them in sets for giveaway.
Note:
- Sadly I'm not close at all to any Michael's but all the sequins and embellishments in the photo are all from Sampeng in Chinatown and range from 80 baht to 100 baht for a bag full.  You can also check out B2S and BeTrend, they have some as well, not a whole lot but beats a trip to Sampeng at times!

- I recommend TOA glue or Elmer's since it's easy to use and it really sticks well once you let it dry properly.

Bag and Store It


Wanted to share this find from IKEA, it's the SKUBB Storer and it worked out perfect for storing my bags and purses!  And best yet, it was 229 baht !  Oh how I would so marry you IKEA if I could!!!!

Have a good weekend everyone!