Found this medicine storage box at Daiso and it was perfect for my daughter's Shopkins. Decorated with some washi tape and ready for the many Shopkins, if she'll just keep them in there.
Shopkins Storage
Found this medicine storage box at Daiso and it was perfect for my daughter's Shopkins. Decorated with some washi tape and ready for the many Shopkins, if she'll just keep them in there.
Labels:
Daiso,
Shopkins,
storage,
washi tape
Polymer Clay Fun
The kids have been having so much fun with polymer clay. After watching many Youtube videos we finally got some polymer clay from Malaysia Clay Art, they have a starter kit with different colors and it's perfect for beginners.
Some of our favorite Youtubers for polymer clay tutorials:
Here are some of our creations!
![]() |
| Photos from Me Crafty Mama and Malaysia Clay Art |
Thainie Fixes: Charger Cable Fixer with Art Clay
I had a bunch of the non toxic art clay when I was making the Monster High headpiece and today I finally got another good use of the art clay (since my kids would probably use it and trash it faster than you saying art clay).
I used it to fix my fraying charger cables and it worked out pretty good!
Quick Valentine's Day Gifts for Classmates!
This
year I wanted to get some non-candy treats for the kids' classmates
Valentine's but it's a bit pricey when it's not candy! Luckily, I was
walking in IKEA with a 200 baht gift card and found these cute flowers
for 15 baht each and I needed 10, perfect! So got home and had my
daughter cut out paper hearts and we used this cool Sakura Pen-Touch
Metallic Gold pen to write on the red hearts and then we cut two slits
for the flower to go in and we had a Valentine's for the girls!
Now the boys, I really couldn't find something that wasn't too expensive, I actually didn't find anything. Well, I always loved these Mentos Kidz for goodie bags and thought about the phrase "We were Mentos to be Friends" and I had to make these!!! You can click and save to print your own too!
Labels:
craft,
handmade,
homemade,
kids,
Valentine's Day
Thainie Visits: Root Garden on Thonglor
Just recently we came across "Root Garden" (a cozy little urban garden/farm) on Thonglor Soi 3, next to the Pridi Banomyong Institute. For once, a plot of land that wasn't going to be a condo, a strip mall or forgotten dilapidated land. Once you step in the garden, it's like you're really not on Thonglor anymore. There's a little pond, a chicken and goat shack, a mushroom shack, a vegetable garden and other plants that have been labeled in English. There's also a cute little coffee shop right in front serving some drinks and snacks.
Here's an article more on Root Garden:
http://www.bangkokpost.com/print/461145/
And check out their FB Page too:
https://www.facebook.com/pages/Root-Garden-At-Thong-Lor
It's located in Sukhumvit 55 and at the top of Thonglor Soi 3. About 5 minutes from BTS Thonglor Station.
Certainly worth a trip with the kiddies!
Labels:
day trips,
education,
fun,
kids,
urban farm
Thainie DIY: Soft Toys Basket/Display
As you may know or will know now, I love to rearrange our home, it's amazing how a room can totally transform with just a move of a piece of furniture or some additions (or subtractions).
I have been trying to find a nice and inexpensive way to display the kids' soft toys which were piled away in a toy box, since the ones that we keep usually have a sentimental value to either us or them. Well I thought about these IKEA green baskets but always decided no since you can't really see the soft toys and it's just another place to pile them. But I thought, why not cut them out?
And so I took my IKEA membership card and cashed me out some coupons!!! Little secret, it's nice to have friends that use your card and earn points for you! These baskets were 199 baht each and they are very sturdy, we actually use one for our laundry (that's how after looking at it everyday I finally thought of a hack!).
So all you have to do is just cut an opening out and there you go! Easy hack but really cute display basket!
WARNING::: Please be very, very, very, extra specially, very careful when using a cutter to cut this basket (or anything with a cutter, they actually terrify me greatly and I avoid using one at all cost but my scissors were just not cutting it **pun intended) and I almost gashed myself several times! Also, always cut away from yourself!
And here's a close up, you can see it's not perfect (after cutting I also shaved away the sharp edges) but the soft toys will make up for that.
Labels:
diy,
hack,
home decor,
IKEA,
organizing,
soft toys,
stuff animals,
toys
Salad Spinner Art & Other Uses!
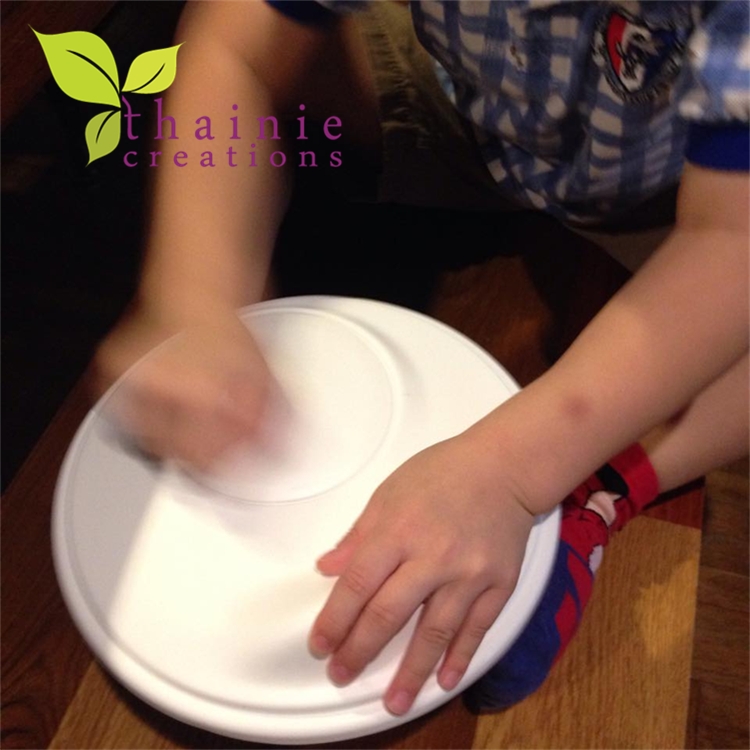
Did you ever see those TOKIG salad spinners at IKEA? Well did you know you can spin more than salad? They're great for art and they're actually the great for your delicates (you know your over the shoulder, boulder holders?!)!
So I won't be showing you my bra spinning but I will show you how we do art with them.
Paint
We start with some paints. I'm using acrylic paints mixed with a bit of water. Those plastic paint bottles are actually from hair dying kits that I've washed out really well and they make great bottles for paints and glue for crafts.
Salad Spinner
Paper/Cardstock
Then you load your paper inside and squeeze a bit of paint where ever you want.
Then close and spin to your heart's content...
And you'll get some beautiful one of kind art pieces like these!
You might want to get one just for art projects and another for your delicates since it can get a bit messy!!!
Happy Crafting!!xx
Labels:
art,
cards,
craft,
diy,
Handy Helpers,
IKEA,
kids,
repurposing,
salad spinner
24 Goods Things To Do Till Christmas
Our Elf on the Shelf arrives on the first day of December and along with his arrival he brings Santa's sack filled with Advent Calendar pouches and Christmas books.
In past years we usually filled the pouches with candy but the kids have been having way too much sweets lately so I thought we would do something new and a little bit more meaningful. I got this idea from a fellow mommy friend and tweaked her (already amazing) list to suit our family a bit. It's a list of 24 good things, so each day the kids will open a pouch and we'll do what is on the sheet of paper.
So here is our list for this year....
1. Make popcorn and watch a holiday movie
2. Bake cookies and bring them to friends at
school
3. Gather clothes to donate
4. Sing Christmas songs and dance around a
lot
5. Make cards for your friends at school
6. Donate books to your school
7. Write a letter to Santa
8. Make cards for all the grandparents and
mail them
9. Gather toys to donate
10. Color a Christmas picture and hang paper
snowflakes
11. Make special cards and send to your
cousins
12. Have a campout by the Christmas tree
13. Dress up and take silly Christmas
pictures.
14. Make Olaf marshmallows and dip in hot
chocolate!
15. Bring coffee gift cards to your teacher
and say thank you
16. Give the guards some cookies and say thank
you
17. Do a Christmas song & dance show for
your parents
18. Make cards for all your teachers
19. Give flowers to your teachers and say thank you
20. Go look at Christmas lights
21. Make bread dough ornaments
22. Call grandparents and sing a Christmas song
23. Draw
a thank you note for Santa
24. Leave a treat for Santa and his reindeer
So here's goes hopefully something special and hope this December brings you and your family a lot of somethings special too!!
Labels:
24ThingsToDoTillChristmas,
Christmas,
crafty,
elf,
elf on a shelf,
fun,
kids,
Santa,
traditions
Thainie Craft: Spooky Haunted House Fill and Color Cut-It-Out
Another cute Halloween craft for the kiddies. I got this creative idea from Sarah Jane's blog. I tried to find a print and cut or any cuts from the Silhouette shop but couldn't find any so I used Sarah's cute template as a template for cutting on the Cameo. Here's the outline and all you need to do is:
- Click this image and then it will give you the full size image
- Right click and save to your computer
- Open your Silhouette Studio
- Drag or open the image in your new file and according to your paper choice (i.e. A4, letter...)
- "Image trace" the entire house
- Select "Trace"
- Either resize now or you could resize when you first drag to the mat
OR if you don't have a cutting machine, it's easy to cut out with a cutter or exacto knife.
And you'll have a super spooky haunted house for your kids or you to decorate for Halloween.
- Click this image and then it will give you the full size image
- Right click and save to your computer
- Open your Silhouette Studio
- Drag or open the image in your new file and according to your paper choice (i.e. A4, letter...)
- "Image trace" the entire house
- Select "Trace"
- Either resize now or you could resize when you first drag to the mat
OR if you don't have a cutting machine, it's easy to cut out with a cutter or exacto knife.
And you'll have a super spooky haunted house for your kids or you to decorate for Halloween.
Halloween: Monster High's Deuce Gorgon
This year my son wanted to be Deuce Gorgon from Monster High and so I looked at the Deuce doll that we had and noted what I needed to get together to make a costume for him. It's quite an easy ensemble, this was my checklist for Deuce (some items we already had too).
After the snakes were done and left to dry (I forgot to mention that when you're doing the snakes, use another wire to make scores onto one side of the snake to create a scales look, do the same with headpiece too--I had used this iron grill thingy), I took a big ball of modeling clay and flattened it into a round piece and then put it over the head model and molded around the head then a placed each snake into place and added a bit more clay to help support some snakes but be sure to let your snakes dry before doing this since modeling clay is quite sticky.
- Scales
- Red Tank (or a red tee and cut off the sleeves)
This was hard to find on the internet and so luckily we had the doll and so I took a hi res picture of the tee and then recolored the red area. You can print on iron-on/T-shrit transfer paper and iron on the tank.
- Striped Tee
- Striped Tee
I was really lucky to have found a close enough pattern but it had this hideous embroidered cartoon **that you cannot remove even with patience and a thread cutter** and so I just cut it out and patched it up with the sleeves that were cut off. Then you can just cut the middle of the tee and create the sleeveless jacket. I also found the perfect image that I printed on T-shirt transfer paper so that I could iron on the patch. Here's the image.
- Black Jeans
- Black Jeans
We had black jeans already and so I took a washable white fabric pencil then thought to use a Crayola white crayon and drew the little diamonds all over. The crayon is washable (hopefully) so I hope it will wash off!
- Black Glove
We found a cheap pair at a party store, they were perfect.
- Belt
We had a metal buckle belt already and so I just printed the cassette image that I created and then laminated and used foam tape to attach to the buckle.
- Black cuff piece (piece of felt)
I just cut a piece of felt and then ironed on another skull on it.
- Checkered Shoes
Didn't have these so he'll just wear his black sneakers he has.
- Snake Headpiece
This was the most daunting part of the costume to do but I was excited to create it.
First I needed a head model, so I took a cap of his and stuffed it with clothes, then placed it on a stand and saran wrapped all over it.
Then I got modeling clay, the type where it will air dry light. So I first worked on the
After the snakes were done and left to dry (I forgot to mention that when you're doing the snakes, use another wire to make scores onto one side of the snake to create a scales look, do the same with headpiece too--I had used this iron grill thingy), I took a big ball of modeling clay and flattened it into a round piece and then put it over the head model and molded around the head then a placed each snake into place and added a bit more clay to help support some snakes but be sure to let your snakes dry before doing this since modeling clay is quite sticky.
Then let it dry completely for about 2-3 days, I took it off the head model on day 2 so that the inside could dry. I sponge painted the headpiece with yellow and light green acrylic paints. Then I use Mod Podge Matte all over and topped with Mod Podge Gloss. The tongues are also made of red modeling clay, just do strips and let dry then cut off that triangular trip and glue into mouth. The eyes are gold beads that I glued into the sockets.
- Scales
I printed a bunch of these on tattoo paper.
I found some plastic chains and red sunglasses at the 60 baht shop Daiso and they were perfect for this.
So I hope you will be able to create your own Deuce and hope that I didn't miss anything!! Happy Crafting!
Labels:
costumes,
craft,
Deuce Gorgon,
diy,
Halloween,
handmade,
homemade,
kids,
Monster High,
tees
Stickers for the Stinkies
I saw this just recently on my FB feed and knew I had to do this since we just swapped out my little stinkies' (my two younger kids) chest of drawers with my older stinkie's (my eldest daughter) ones. The kids' loved it and were excited to get things organized (starting them young!) and even asked for a few more clothes silhouettes that weren't represented!
I also experimented with painting vinyl stickers with Mod Podge. I tried one with just Mod Podge Extreme Glitter painted on but I thought it was a bit still tacky and it turned out that when you use transfer tape/masking tape to transfer your sticker and peel it off, the glue came off too. And so I painted another vinyl sticker sheet with Mod Podge Extreme Glitter and a top coat of Mod Podge Matte and it turned out nicely.
I have also posted these silhouettes if you would like to make them for your stinkies. Just click to bring up the image and you can right click and save to your computer to use with the Silhouette software. Once you're on Silhouette software, just use the Image Trace button and highlight the image and there should be no need to do anything since it's a simple image.
I also tried coating paper stickers and photographs with the Mod Podge and they turned out really nice and thinking to use it in an upcoming Christmas craft. Stay tuned!
Happy Crafting!
Labels:
children,
labels,
mod podge,
organizing,
Silhouette,
sticker,
vinyl stickers
Thainie Crafty Field Trip
I have been wanting to check these shops out for the longest time and finally got a chance a few weeks ago when I had to find some items for a project I'm working on. Also any kind of craft/stationary shop, I'm in for an outing! All these shops are located on the 5th Floor of Central Rama 9.
Somjai http://www.somjai.co.th/
(website in Thai only)
I love this shop, it reminds me of the stationary shops when I was growing up in San Francisco. They have a good selection of paints, pens, stamps, paper, the list goes on.
Doesn't the shop front already look inviting??
Sharpies!!!! And not Sharkies or Starpies!!
*** Update, you can now find an assorted array of Sharpies at most B2S stores!
Assorted craft paints, glues, glitter, etc...
More paint, vinyl stickers, papers, canvases, etc...
Mind Memory http://www.mindmemorystore.com/
(website in Thai and English)
A very nice store for your scrapbooking needs, has a good selection of Martha Stewart items, Cricut and other brands. But the most important....they have Mod Podge!!!!
Now if you're not acquainted with Mod Podge, try doing a search and if you are interested in experimenting with it, I suggest you get the originals to play with, which is the Mod Podge Matte or Gloss.
Komonoya http://www.watts-th.com/
(website in Thai and Japanese)
I'm always torn between Daiso and Komonoya but they both have their own items distinctive in their stores. But at this Komonoya, I found some really nice felt items.
Happy Crafting!
Masking Tape
Did you know you can use masking tape for sticker transferring? Here are some pictures showing how easy it is and a cheaper solution.
I also found wider masking tape at B2S, and it's come in real handy. And while we're talking masking tape, check out these from Scotch. They have them at most B2S. A cheaper option to washi tape too.
***Unfortunately, I'm not sponsored by Scotch and this post are just my random finds.
I also found wider masking tape at B2S, and it's come in real handy. And while we're talking masking tape, check out these from Scotch. They have them at most B2S. A cheaper option to washi tape too.
***Unfortunately, I'm not sponsored by Scotch and this post are just my random finds.
Labels:
cameo,
craft,
crafts,
diy,
masking tape,
Silhouette,
sticker,
vinyl stickers,
washi tape
Subscribe to:
Posts (Atom)


.jpg)
.jpg)
.jpg)
.jpg)
.jpg)

.jpg)